There’s something timeless about making a soft toy with your own hands, and a crochet teddy bear pattern is one of those projects that never goes out of style. Whether you’re new to amigurumi or already love creating handmade toys, a teddy bear is always a cozy and rewarding piece to crochet.
Many crafters enjoy starting with a free crochet teddy bear pattern because it’s a great way to practice shaping, stuffing, and assembling small plush animals without needing complicated techniques. With simple stitches like single crochet and basic increases and decreases, even beginners can create an adorable bear that looks great on a shelf or in a child’s room.
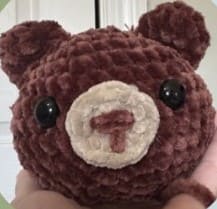
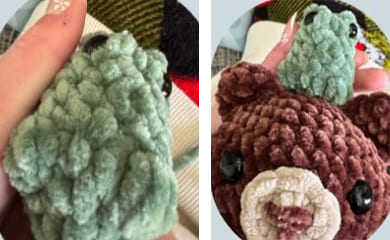
Crochet teddy bear with froggy pattern
What makes this design extra charming is the tiny frog sitting on the teddy’s head. Adding a mini crochet frog pattern brings a playful twist to the classic teddy bear and makes the finished project feel even more unique. Small details like safety eyes, soft velvet yarn, and carefully stitched features give the toy that irresistible handmade character.
Projects like this are perfect examples of why people love making crochet animals. They’re cute, relaxing to create, and perfect for gifts. A teddy bear with a tiny frog friend can easily become a favorite handmade keepsake for someone special.
Designer: crochet_by_kenz07
Abbreviations:
sc- single crochet
inc- increase
dec- decrease
BO- bobble stitch
cc- color change
BLO- back loop only
FO- finish off
MR- magic ring
Materials:
Yarn:
Brown (I’m using cocoa by parfait chunky)
Green (pistachio parfait chunky)
Beige (toffee parfait chunky)
Crochet hook: 5mm or what works for your yarn.
Stuffing.
2 sets of safety eyes (16mm and 10mm)
Scissors
Sewing needle
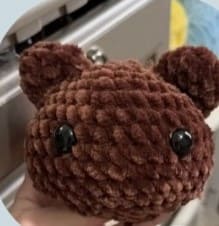
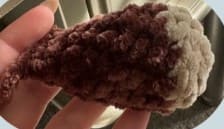
Head
In brown:
R1. 6 sc in a MR (6)
R2. inc x6 (12)
R3. (sc,inc)x6 (18)
R4. (2sc,inc)x6 (24)
R5. (3sc,inc)x6 (30)
R6. 12sc, 2 inc, 13sc, 2 inc, sc (34)
R7-10. sc around (34) – 4 rounds.
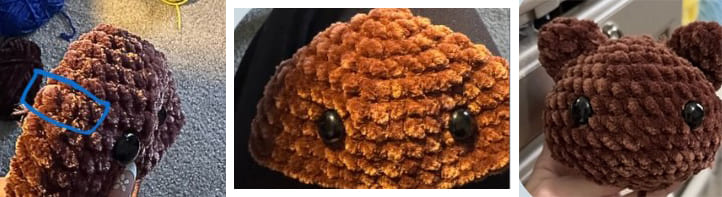
Stop here: place the eyes in between the 2 inc from R6 between R7-8 with 5-6 stitches between. (photo 1).
Tip, i fold mine in half on the decreases.
R11. 12 sc, 2dec, 13sc, 2dec, sc (30)
R12. (3sc,dec)x6 (24)
Start stuffing.
R13. (2sc,dec)x6 (18)
R14. (sc,dec)x6 (12)
FO but do not close, leave a long tail to sew.
Ears X2
In brown:
R1. 6 sc in a MR (6)
R2. (sc,inc)x3 (9)
R3. sc around (9)
Fold in half and make 4 sc across the top.
FO and leave a long tail to sew.
Sew the ears in line with the magic ring between rounds 3-7.
Muzzle
In beige:
Depending on how far apart you placed the eyes, you may want to change to size of the magic ring.
For 5 stitches apart:
R1. 4 sc in a MR (6)
R2. 4 inc (8)
For 6 stitches apart:
R1. 5 sc in a MR (5)
R2. 5 inc (10)
FO and leave a tail to sew or you can glue.
Glue or sew the muzzle between the eyes with 1 stitch between the eyes on both sides.
Embroider the nose in the middle of the muzzle, you can use brown or black.
Arms X2
In brown:
R1. 5 sc in a MR (5)
R2. 5 inc (10)
R3-6. sc around (10) – 4 rounds.
R7. (1sc,dec)x3, 1sc (7)
R8. dec, 5sc (6)
R9. sc around (6)
Fold in half and make 3 sc across the top, finish off and no need for a tail since they are crocheted in.
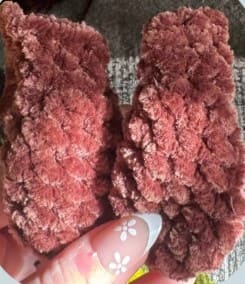
I personally did not stuff for a floppy look, if you want a more chunky look feel free to stuff them.
Legs X2
Start in beige, then brown:
R1. 5 sc in a MR (5)
R2. 5 inc (10)
R3. (4sc,inc)x2 (12) (cc to brown in the last stitch)
R4. BLO: sc around (12)
R5-6. sc around (12) – 2 rounds.
Stuff and continue to stuff as you go.
R7. (4sc,dec)x2 (10)
R8-10. sc around (10) – 3 rounds.
R11. 5 dec (5)
Fold in half and make 3 sc across the top, FO and weave in the ends.
Body
Start in brown:
R1. 6 sc in a MR (6)
R2. 6 inc (12)
R3. (sc,inc)x6 (18)
R4. Grab the legs, you will crochet them in here: (red means through leg and body)
2sc, inc, 2sc, inc, 2sc, inc, 2sc, inc, (2sc,inc)x2 (24)
R5. (3sc,inc)x6 (30)
R6. (4sc,inc)x2 (36)
R7-9. sc around (36)- 3 rounds
R10. (4sc,dec)x6 (30)
R11. sc around (30)
R12. (3sc,dec)x6 (24)
R13. Grab the arms (red means through body and arm): 2sc, 3sc, 10sc, 3sc, 6sc (24)
Start stuffing and continue as you go.
R14. (2sc,dec)x6 (18)
R15. (sc,dec)x6 (12)
FO, finish stuffing and weave in the end.
Freddy the froggy
In green:
R1. 6 sc in a MR (6)
R2. (sc,inc)x3 (9)
R3. 2sc, inc, BO, sc, inc, BO, sc, inc (12)
R4. sc around (12)
R5. (2sc,dec)x3 (9)
Stuff and continue to stuff as you go.
R6. sc, dec, BO, dec, BO, dec (6)
R7. 3 dec (3)
Finish stuffing and add the 10 mm safety eyes in the bobble stitches.
FO and close take the extra tail through the middle of the eyes on the top of the head and put it through the magic ring.
Sew the frog to the bear’s head in between the ears.
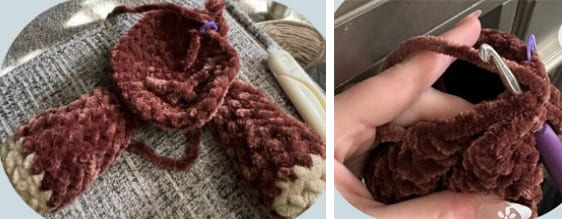
Assembly
Sew the head to the body.
You are now finished.
admin
Recommended To You