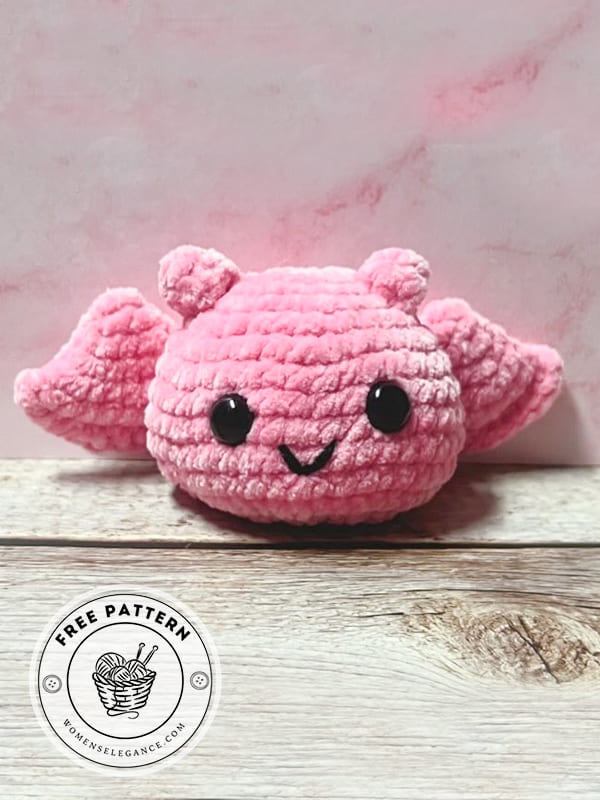
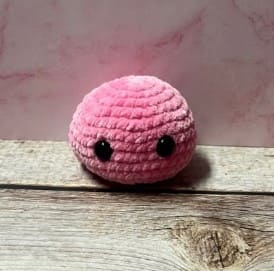
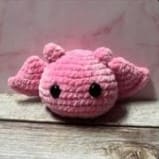
If you enjoy making cute handmade toys, this mini crochet bat free pattern is a fun little project to try. Small amigurumi animals are perfect for relaxing crochet sessions, and they also make adorable gifts, keychains, or desk decorations. This tiny bat design is simple, beginner-friendly, and works up surprisingly fast.
The best thing about this simple crochet bat free pattern is that it doesn’t require complicated shaping. Most of the piece is made using basic stitches like single crochet, increases, and decreases. Because of its small size, you can finish the entire bat using leftover yarn from other projects. Soft pastel colors, classic black yarn, or even bright Halloween shades all work beautifully.
Projects like this are also a great way to explore the world of crochet animals. Small amigurumi patterns help beginners practice tension control, stitch consistency, and simple assembly techniques. Even if you’re new to crocheting toys, a mini bat is a manageable starting point before moving on to larger stuffed animals.
Mini crochet bat free pattern
Another nice feature of this pattern is how customizable it is. You can adjust the wing size, add embroidered sleepy eyes, or even turn the bat into a keychain or bag charm. Many crafters also enjoy making a few bats in different colors to create a cute little collection.
If you’re searching for a quick crochet bat pattern for beginners, a small amigurumi bat, or an easy crochet animal pattern, this mini bat project is a perfect choice. It’s simple, charming, and a great reminder that even the smallest crochet animals can bring a lot of joy to your handmade collection.
Designer: theloopyfairyy
Materials:
Yarn (parfait chunky): body color
Worsted yarn for mouth (black caron yarn)
Hook (4.5mm)
Sewing needles
Stitch markers
Safety eyes (14mm)
Stuffing
Yarn cutter/scissors
Abbreviations:
MR- magic ring
sc- single crochet
inc- increase
dec- decrease
FO- fasten off
Bat body
R1. MR 6 (6)
R2. inc x6 (12)
R3. (sc,inc)x6 (18)
R4. (2sc,inc)x6 (24)
R5. (3sc,inc)x6 (30)
R6. (4sc,inc)x6 (36)
R7-8. sc around (36) – 2 rounds.
R9. (5sc,inc)x6 (42)
R10-12. sc around (42) – 3 rounds.
Insert safety eyes to R8.
Start stuffing and continue as you go.
R13. (sc,dec)x14 (28)
R14. dec x14 (14)
R15. dec x7 (7)
Close hole and FO.
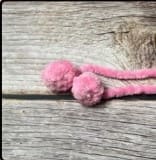
Horns (X2)
R1. 4 MR (4)
R2. (sc,inc)x2 (6)
Don’t stuff.
FO and leave a long tail for sewing.
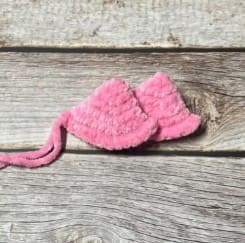
Wings (X2)
R1. 4 MR (4)
R2. inc x4 (8)
R3. (sc,inc)x4 (12)
R4. (2sc,inc)x4 (16)
R5. (3sc,inc)x4 (20)
R6. (4sc,inc)x4 (24)
Do not stuff. Fold in half and 12 sc across.
Assembly
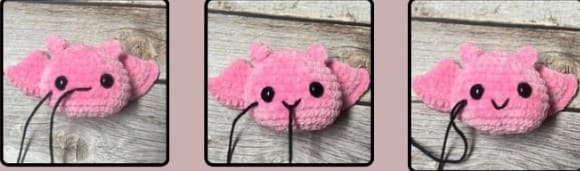
Sew horns onto the top of the head. I sewed it onto R2-R4.
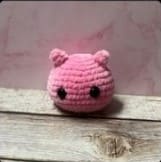
Sew wings to the back. I sewed it to R7-R11 but you can sew it where you want.
Add a mouth.
And all done!
admin
Recommended To You