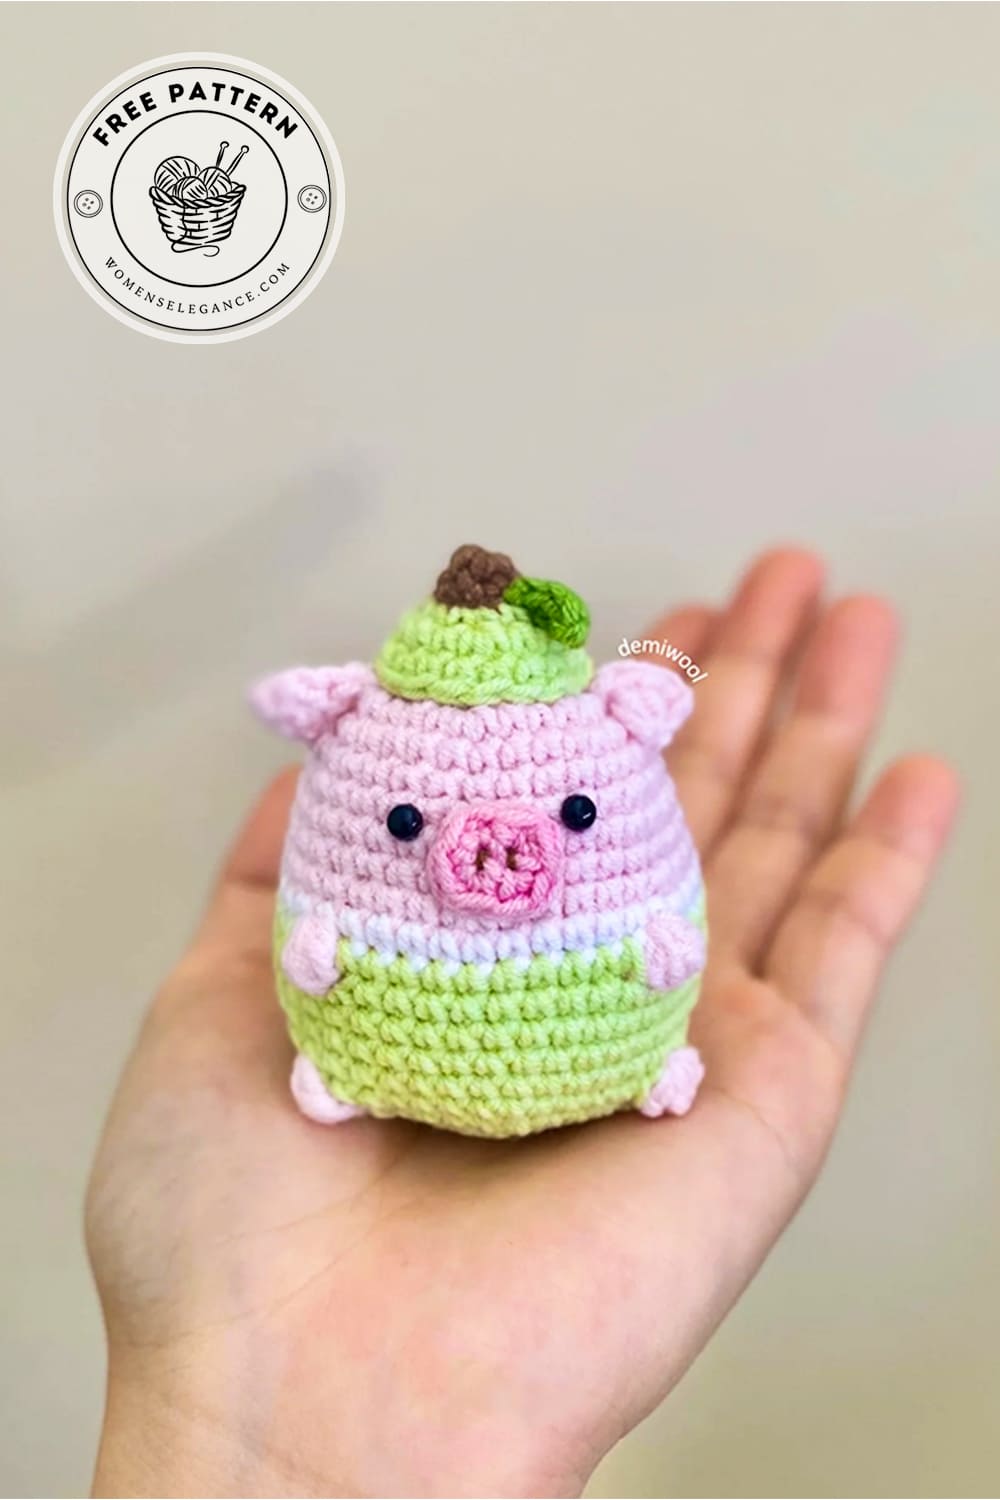
If you’re looking for a crochet pig pattern that is quick, adorable, and beginner-friendly, this tiny design is the perfect choice. This sweet little pig has a soft round body, tiny ears, and a charming pastel outfit that makes it stand out in any handmade collection. A cute crochet pig pattern like this is ideal for creating keychains, desk decorations, gift toppers, or nursery decor.
Pear mini crochet pig pattern
This mini crochet pig pattern works up fast with only a small amount of yarn, making it great for using leftover colors from other projects. Its compact size also makes it one of the most enjoyable projects for fans of crochet animals who love making small and collectible amigurumi designs. You can customize the hat, body colors, or facial details to create your own unique pig character.
Whether you’re new to amigurumi or already love tiny handmade toys, this design fits perfectly into your collection of free amigurumi patterns. It’s simple, fun, and full of personality, which makes it a lovely project for spring markets, handmade gifts, or just a relaxing weekend crochet session.
Add this little pig to your growing list of crochet animals and enjoy making a soft, playful friend that everyone will love.
Designer: demiwool
Materials:
1. Yarn: I used yarnart jeans cotton yarn.
2. Hook: size 2.0mm.
3. Stitch markers.
4. Yarn needle.
5. Scissors.
6. Pins
7. Safety eyes: 5mm
8. Stuffing.
Colors:
• Light green, green light pink, pink brown, white.
• A little black/dark brown yarn for the nose.
Abbreviations:
R: round
MR: magic ring
st: stitch
sc: single crochet
ch: chain
inc: increase
dec: decrease
slst: slip stitch
BO: bobble stitch = 4 dc together
Size: If you use the same yarn as me, the finished pig will be around 7.5 cm/ 3.0 in long.
Head and body
Start with light pink yarn.
At R12 and R17, there’re 2 BO’s in each round. These BO’s will form the
arms and legs.
Note: BO = 4 unfinished dc worked together.
R1: MR, 8sc (8)
R2: 8inc (16)
R3: (sc, inc) x 8 (24)
R4: (3sc, inc) x 6 (30)
R5-6 (2 rounds): 30sc (30)
R7: (4sc, inc) x 6 (36)
R8-9 (2 rounds): 36sc (36)
R10: (5sc, inc) x 6 (42)
R11: (change to white yarn) 42sc (42)
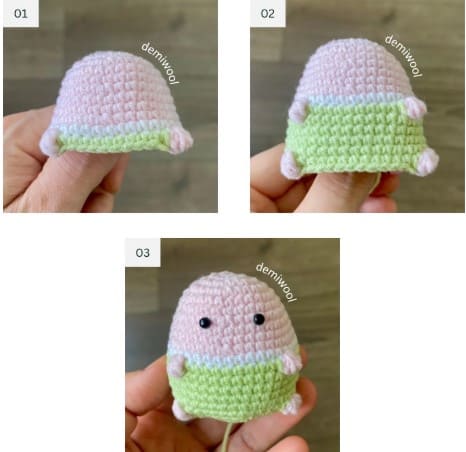
R12: (light green) 15sc, (light pink) BO, (light green) 10sc, (light pink) BO, (light green) 15sc (42) (pic 1)
R13-16 (4 rounds): (light green) 42sc (42)
R17: (light green) 14sc, (light pink) BO, (light green) 12sc, (light pink) BO, (light green) 14sc (42)
Note: You can adjust the placement of the BO’s in R17 to align with the BO’s in R11, depending on your tension, as long as each BO in R17 is separated by 12sc (pic 2).
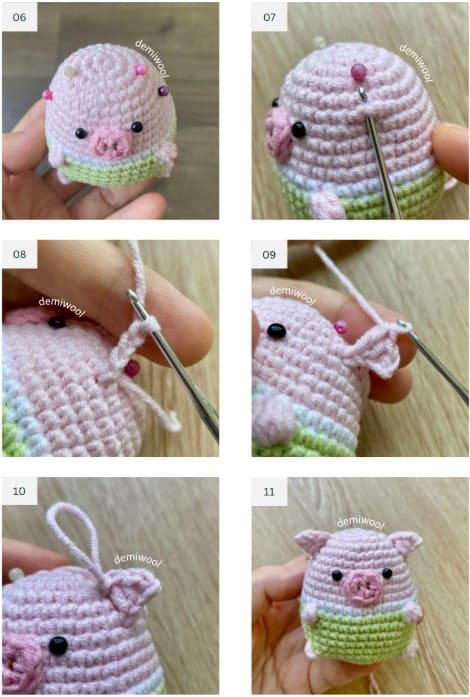
Insert the eyes between R7 and R8, spacing them 4 stitches apart (side to side), adjusting as needed based on eye size. The space between the two eyes is reserved for sewing the nose later.
Stuff the body and continue to stuff as you go.
R18-R22: all light green.
R18: (4sc,dec)x7 (35)
R19: (3sc,dec)x7 (28)
R20: (2sc,dec)x7 (21)
R21: (sc,dec)x7 (14)
R22: 7 dec (7)
Stuff the body firmly, fasten off, cut the yarn, close the remaining gap and weave the yarn in (pic 3).
Nose
Use pink yarn.
Ch3. From the 2nd stitch from the hook, make following stitches: inc, 4sc in the same st (also the last st of the chain), inc in the other side of the chain.
• Fasten off, cut the yarn and leave a long tail for sewing.
• Use black yarn or dark brown yarn to embroider 2 nostrils (pic 4).
• Sew the nose onto the body, between R6 & R9 of the body (pic 5).

Ears
Use light pink yarn.
Use pins to mark the ear positions at R4 and R6.
• Insert your hook into the marked stitch at R6, attach a new strand of light pink yarn, and ch4.
• Starting from the 2nd st from the hook, work down the chain: sc, hdc, dc. Then slst into the marked stitch at R4.
• You have completed 1 ear.
Repeat the same steps for the other ear.

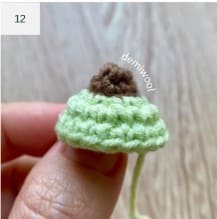
Hat
Start with brown yarn.
R1: MR, 6 sc (6)
R2: 6 sc (6)
Change to light green yarn.
R3: BLO 6 inc (12)
R4: (sc,inc)x6 (18)
R5: 18 sc (18)
Fasten off, cut the yarn and leave a long tail for sewing. (pic 12)
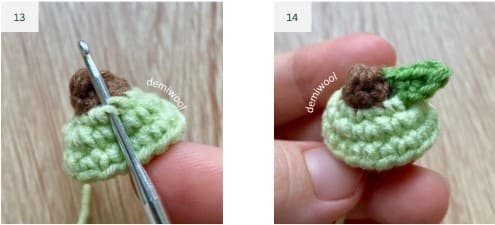
Leaf
Insert your hook into any stitch at R3 of the hat (pic 13), attach a new strand of green yarn, and ch 4.
Starting from the 2nd st from the hook, work down the chain: sc, hdc, sc. Then slst into R2.
Fasten off, cut the yarn and weave it in (pic 14).
Assembly
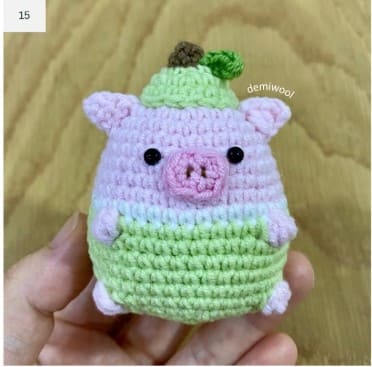
Sew the hat on the top of the head, stuff the hat slightly during sewing (pic 15).
Now you’ve finished the pear crochet pig.
admin
Recommended To You