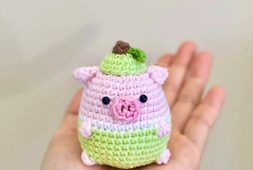
Tiny handmade accessories can make the biggest impression, and a crochet cat keychain is a perfect example. This adorable project is fun to create, easy to personalize, and ideal for gifting or selling at craft fairs. If you are searching for a crochet cat keychain free pattern, this beginner-friendly idea is a great place to start.
A simple crochet cat keychain free pattern usually works up quickly with just a small amount of yarn, making it perfect for using leftover scraps from other amigurumi projects. The compact size means you can finish one in a short session, while still adding cute details like tiny ears, embroidered whiskers, or a colorful bow.
Simple crochet cat keychain free pattern
For makers who are just getting started, a crochet cat keychain free pattern for beginners is a wonderful way to practice basic stitches, shaping, and light stuffing without feeling overwhelmed. It is also a practical project because the finished cat can be clipped onto keys, bags, backpacks, or even used as a charming handmade charm.
Whether you prefer pastel colors or classic kitten shades, this sweet little crochet cat brings personality and charm to every stitch.
Designer: _funny_toy_
Materials and tools:
Yarn- spincosy (milky color)
Yarn- yarnart jeans red color (90)
Brown color (70)
Eyes on safety mount – 8mm
Hook- 1.5mm
Decorative button
Filling for toys
Markers
Sewing needle
Abbreviations:
MR- magic ring
ch- chain
sc- single crochet
inc- increase
dec- decrease
hdc- half double crochet
slst- slip stitch
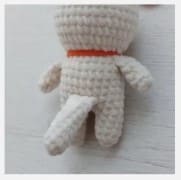
Arms (2 pcs)
Don’t stuff with the filler.
R1. Magic ring 6
R2-6. (5 rnds) sc 6 (6)
Fold in half, crochet sc 3 for two sides of the part.
Cut the thread and fix it with a knot.
Legs (2 pcs)
Fill with stuffing as you crochet.
R1. Magic ring (6)
R2. *sc1, inc1* 3 times (9)
R3-5. (3 rnds) sc 9 (9)
Body
Fill with stuffing as you crochet.
Cut the thread and fix it with a knot on the left leg.
Do not cut the thread on the right leg.
Crochet at the right leg: crochet ch st 3. Connect them with sc 1.
R6 sc 9 (taking into account the sc 1) on the left leg, sc 3 on ch st, sc 9 on the right leg, sc 3 on ch st (24)
Start the new round.
R7-11. (5mds) sc 24 (24)
Crochet “arms” to the body, place them on the both sides.
Grab the loops of the “arm” and body, crochet them together.
R12. sc 4, sc 3 (arm), sc 9, sc 3 (arm), sc 5 (24)
R13. sc 24 (24)
R14. *sc 2, dec 1* 6 times (18)
Head
R15. *sc 1, inc 1* 9 times (27)
R16. *sc 2, inc 19 times (36)
R17-21. (5 mnds) sc 36 (36)
R22. *sc 4, dec 16 times (30)
Insert eyes between 20-21 rounds.
Between the eyes there are 5 loops.
R23. *sc 3, dec 1* 6 times (24)
R24. *sc 2, dec 1* 6 times (18)
R25. *sc 1, dec 1* 6 times (12)
R26. dec 6 (6)
Cut the thread and fix it with a knot. Pull the hole, hide the thread inside.
Tail
Don’t stuff with the filler.
R1. magic ring 8
R2-9. (8 mnds) sc 8 (8)
Fold in half, crochet sc 4 for two sides of the part.
Fix it with a knot. Leave the end of the thread for sewing.
Sew the tail in row 8.
Ears
Make a ring out of yarn, crochet into it sc 1, hdc 1, dc 1, hdc 1, sc 1.
Tighten the ring.
Fix the ears in 3-4 rows, from the top of the head.

Embroider the nose and mustache (from the photo).
Attach a decorative button to the neck.

Cord
Crochet ch st 55
Cut the thread, fix it with a knot.
Secure the cord.
admin
Recommended To You