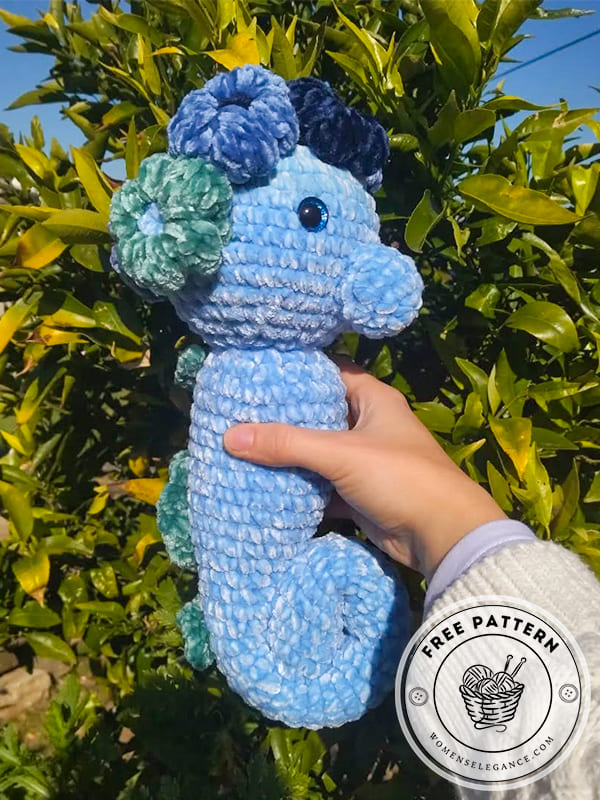
If you enjoy making tiny ocean creatures with yarn, this crochet seahorse pattern is a charming project to try. Seahorses already have a magical look in nature, and when turned into amigurumi they become even more adorable. This design adds a playful twist with small colorful flowers placed on the seahorse’s head, giving it a cheerful and unique personality.
This crochet seahorse amigurumi pattern free project is perfect for anyone who loves working on small crochet animals. The curved body, curled tail, and gentle shape of a seahorse make it a fun and relaxing pattern to crochet. Beginners can enjoy practicing basic stitches, while experienced crocheters can focus on adding tiny decorative details like the flower accents.
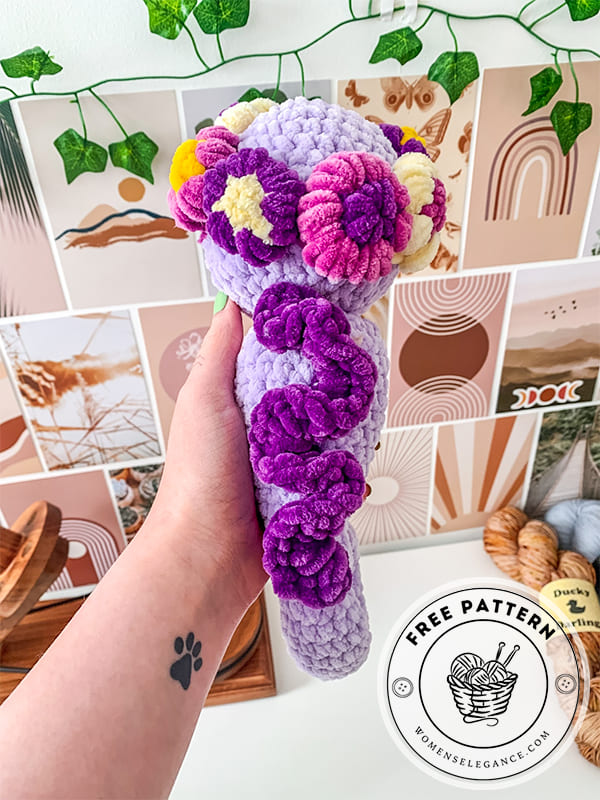
Seahorse with flowers crochet pattern
Another great thing about this seahorse amigurumi crochet pattern is how versatile it can be. You can create it as a small toy, a nursery decoration, or even turn it into a cute keychain. By changing yarn colors, you can design bright tropical seahorses or soft pastel ones that look calm and dreamy.
If you’re exploring crochet sea animals free patterns, a seahorse is definitely a must-try project. It’s small, creative, and full of personality. With its curly tail and little floral crown, this crochet seahorse quickly becomes one of those handmade pieces that makes people smile the moment they see it.
Designer: burrowcrafts
Abbreviations:
sc- single crochet
dc- double crochet
st- stitch
sts- stitches
slst- slip stitch
inc- increase
dec- decrease
ch- chain
rep- repeat
Materials:
– Baby snuggle solid yarn (bulky)
– 5mm crochet hook
– Stitch markers
– Polyester stuffing
– Scissors
– 10mm safety eyes
– Darning needle
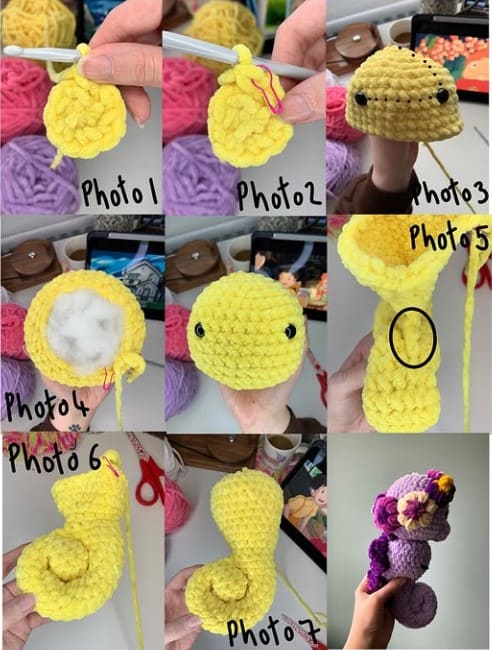
Head
R1. Make a magic ring with 6 sc (see photo 1) (6)
R2. Inc 1 in every stitch, use a stitch marker to mark the beg of the round (see photo 2) (12)
R3. *sc 1 in next st, inc 1 in next st* rep to end of round (18)
R4. *sc in next 2 sts, inc 1 in next st* rep to end of round (24)
R5. *sc in next 3 sts, inc 1 in next st* rep to end of round (30)
R6. *sc in next 4 sts, inc 1 in next st* rep to end of round (36)
R7-12. sc 1 in every st (36)
Place safety eyes in between rounds 8 and 9 and 8 sts apart (see photo 3).
R13. *sc 1 in next 4 sts, dec 1 in next sts* rep to end of round (30)
R14. *sc 1 in next 3 sts, dec 1 in next sts* rep to end of round (24)
Stuff head with polyester stuffing (see photo 4)
R15. *sc 1 in next 2 sts, dec 1 in next sts* rep to end of round (18)
R16. *sc 1 in next st, dec 1 in next sts* rep to end of round (12)
R17. dec in every st (6)
Finish- Break yarn, sew yarn through remaining 6 sts with preferred method, secure with a knot, hide yarn ends.
Body
R1. Make a magic ring with 6 sc (see photo 1) (6)
R2. Inc 1 in every stitch, use a stitch marker to mark the beg of the round (see photo 2) (12)
R3-27. sc 1 in every st, stuff tail lightly (12)
R28. Fold tail to make a spiral, sc through the top of the spiral to help secure tail in its spiral shape (see photo 5) using spare, sew tail together further, to finish the round, sac in every remaining st (12)
R29-30. sc 1 in every st (12)
R31. *sc 1 in next st, inc 1 in next st* rep to end of round (18)
R32-33. sc 1 in every st (18)
R34. * inc 1 in next st, sc 1 in next st* rep 4 times, sc in every st to end of round (22)
R35. sc 1 in every st (22)
R36. sc 1 in next 3 sts, inc 1 in next st, sc 1 in next 2 sts, inc 1 in next st, sc in every st to end of round (see photo 6) (24)
R37-39. sc in every st (24)
R40. *sc 1 in next 3 sts, inc 1 in next st* rep to end of round (30)
R41. sc in every st (30)
R42. dec 1 in all sts (15)
Finish- Break yarn leaving a long tail, attach body to end.
Nose
R1. Make a magic ring with 6 sc (6)
R2. inc 1 in every st (12)
R3-4. sc 1 in every st (12)
Finish- slst into next st, break yarn leaving a long tail, attach to head.
Flowers (make 6-8)
R1. Make a magic ring with 6 sc.
R2. Change colour, make a bubble stitch or puff stitch (depending on the effect you’re looking for, the puff stitches look more like shells and are pictured on the purple seahorse) in every stitch.
Finish- Break yarn leaving a long tail, wait until all flowers are completed to attach to grass so the placement works well.
Back fin
R1. sc into the back of the seahorse in a wavy line from the head to the top of the tail.
R2. Turn with a ch 1, dc inc in every st twice (dc 3 into every st) to end of row.
Finish- Break yarn, hide yarn ends.
The gorgeous crochet seahorse with flowers is ready!
admin
Recommended To You